Advanced Configuration
What You'll Learn in This Guide
Refer to this step when you want to operate multiple cameras together, collaborate with team members in EVA, or build a more sophisticated alert system. EVA's advanced management features allow you to operate efficiently even in large-scale environments.
Apply the same detection rules to multiple cameras at once using Common Scenarios
Improve visibility in low-light or backlit environments with Brightness Adjustment
Receive real-time alerts in external tools like Teams or Slack via Webhook
Set Emergency Alert types to instantly distinguish critical situations
Quickly access key cameras using the Camera Favorites feature
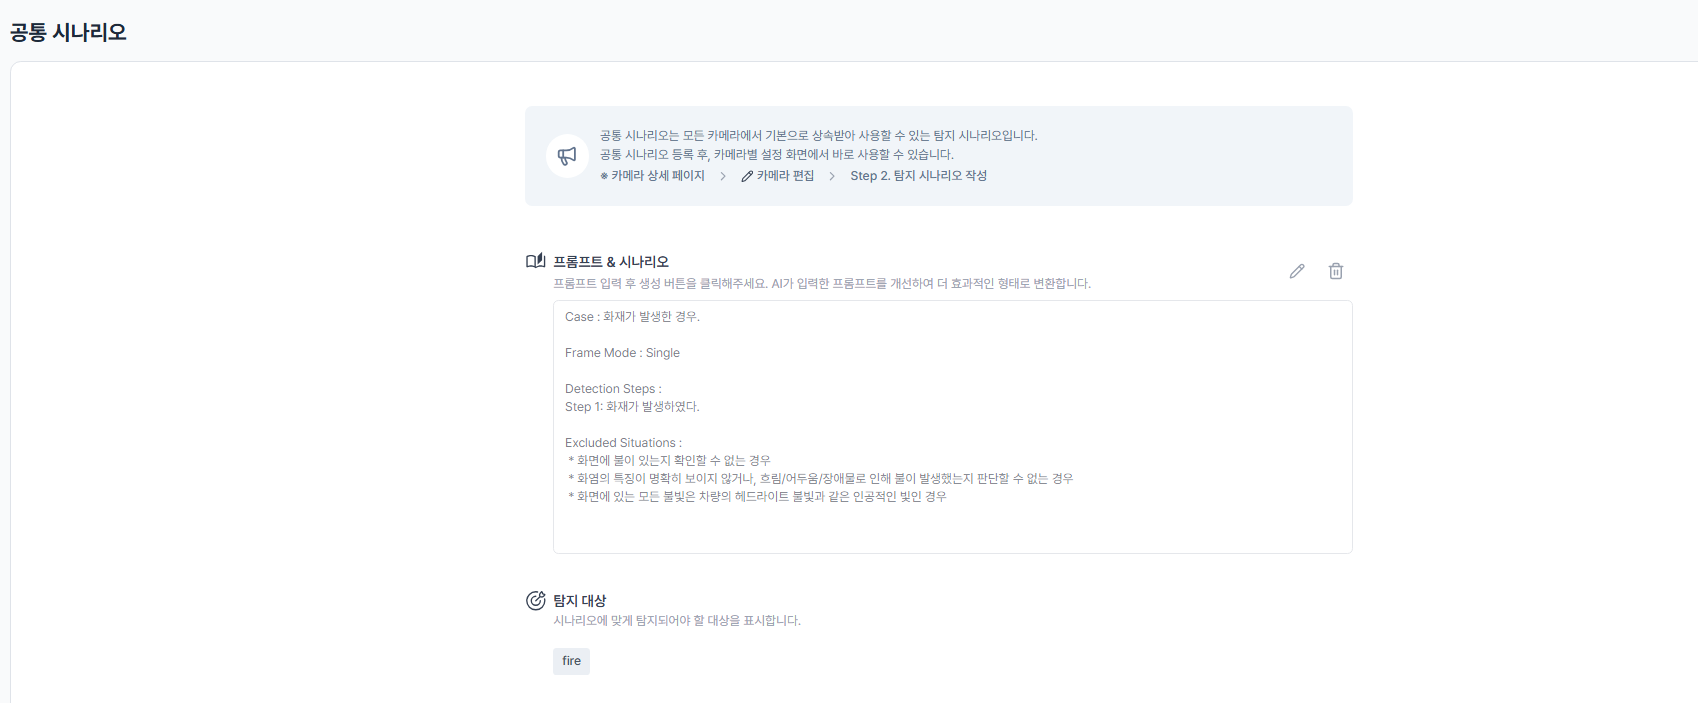
Set Up Common Scenarios
Step Description
Common Scenarios are reusable detection rules that can be inherited and applied across multiple cameras. Define once and deploy everywhere — eliminating the need to rewrite the same scenario for every camera.
- Typical Use Cases
- Apply the same safety rules across all factory work zones: "Detect workers not wearing hard hats"
- Enforce identical access control at every building entrance: "Detect intrusion into restricted areas"
- Monitor the same violation across an entire parking lot: "Detect illegal parking"
Actions
- Go to Settings
- Click "Settings" in the top navigation bar
- Select "Common Scenario"
- Enter Common Scenario management
- Any previously saved scenarios appear in the list
- Click the edit button on an existing scenario to modify it
- Click "+ New Scenario" to create a new one
- Write the scenario prompt
- Describe the detection rule that should apply universally across cameras
- Example: "Alert me if a worker enters the work zone without a hard hat"
- Avoid camera-specific conditions — keep it general
- Generate the scenario
- Click "Generate" to create the structured scenario
- Review the generated detection content
- Verify that the Target information is correctly set
- Review & refine
- Check that the output matches your intent
- Edit Detection Steps or Excluded Situations if needed
- Save
- Click "Save" to store the Common Scenario
- The saved scenario can be applied when registering a new camera or editing an existing one
- Apply to cameras
- New cameras: Select the common scenario during the camera registration flow
- Existing cameras: Choose it from the scenario step when editing the camera
Brightness Adjustment
Step Description
Use the Brightness Adjustment feature to brighten dark scenes or tone down overly bright ones, improving AI detection accuracy. Particularly effective in nighttime or backlit conditions.
- When to use
- Brighten: Nighttime, underground parking lots, or warehouses with insufficient lighting
- Darken: Direct sunlight, strong backlighting from windows or overhead lights
- Range: -100 (very dark) to +100 (very bright)

Actions
- Choose an appropriate brightness value
- Enter an integer between -100 and +100
- Positive (+): Brightens by that percentage (e.g., 50 = 50% brighter)
- Negative (-): Darkens by that percentage (e.g., -30 = 30% darker)
- Enter the command in the Commands panel
- Type the following in the Commands panel on the camera monitoring page
- Format:
set brightness level "number" - Example:
set brightness level 50(50% brighter) - Example:
set brightness level -30(30% darker)
- Confirm the adjustment
- Press Enter — the change takes effect immediately
- Check that "Brightness adjustment active" appears in the top-left of the monitoring view
- Verify the image looks as intended; re-enter a different value if further tuning is needed
Receive Alerts via Webhook
Step Description
Configure a Webhook to send EVA's detection alerts directly to collaboration tools like Microsoft Teams in real time. Your team can stay informed and respond quickly without keeping the EVA interface open.
- Benefits of Webhook alerts
- Real-time team notifications: Every team member receives alerts simultaneously
- Instant response: No need to monitor EVA continuously
- Alert history: All notifications are logged in Teams
- Mobile push: Team members receive push alerts on their mobile devices too
Teams Webhook Setup
- Generate a Webhook URL in Microsoft Teams
- First, create or select an existing Teams chat where you want to receive EVA alerts.
- Open the Workflows app in Teams and search for the "Send a webhook alert to a chat" template. Note that the template name may appear differently depending on your Teams language settings (e.g., "채팅에 웹후크 경고 보내기" in Korean).
Selecting the webhook alert template in the Workflows app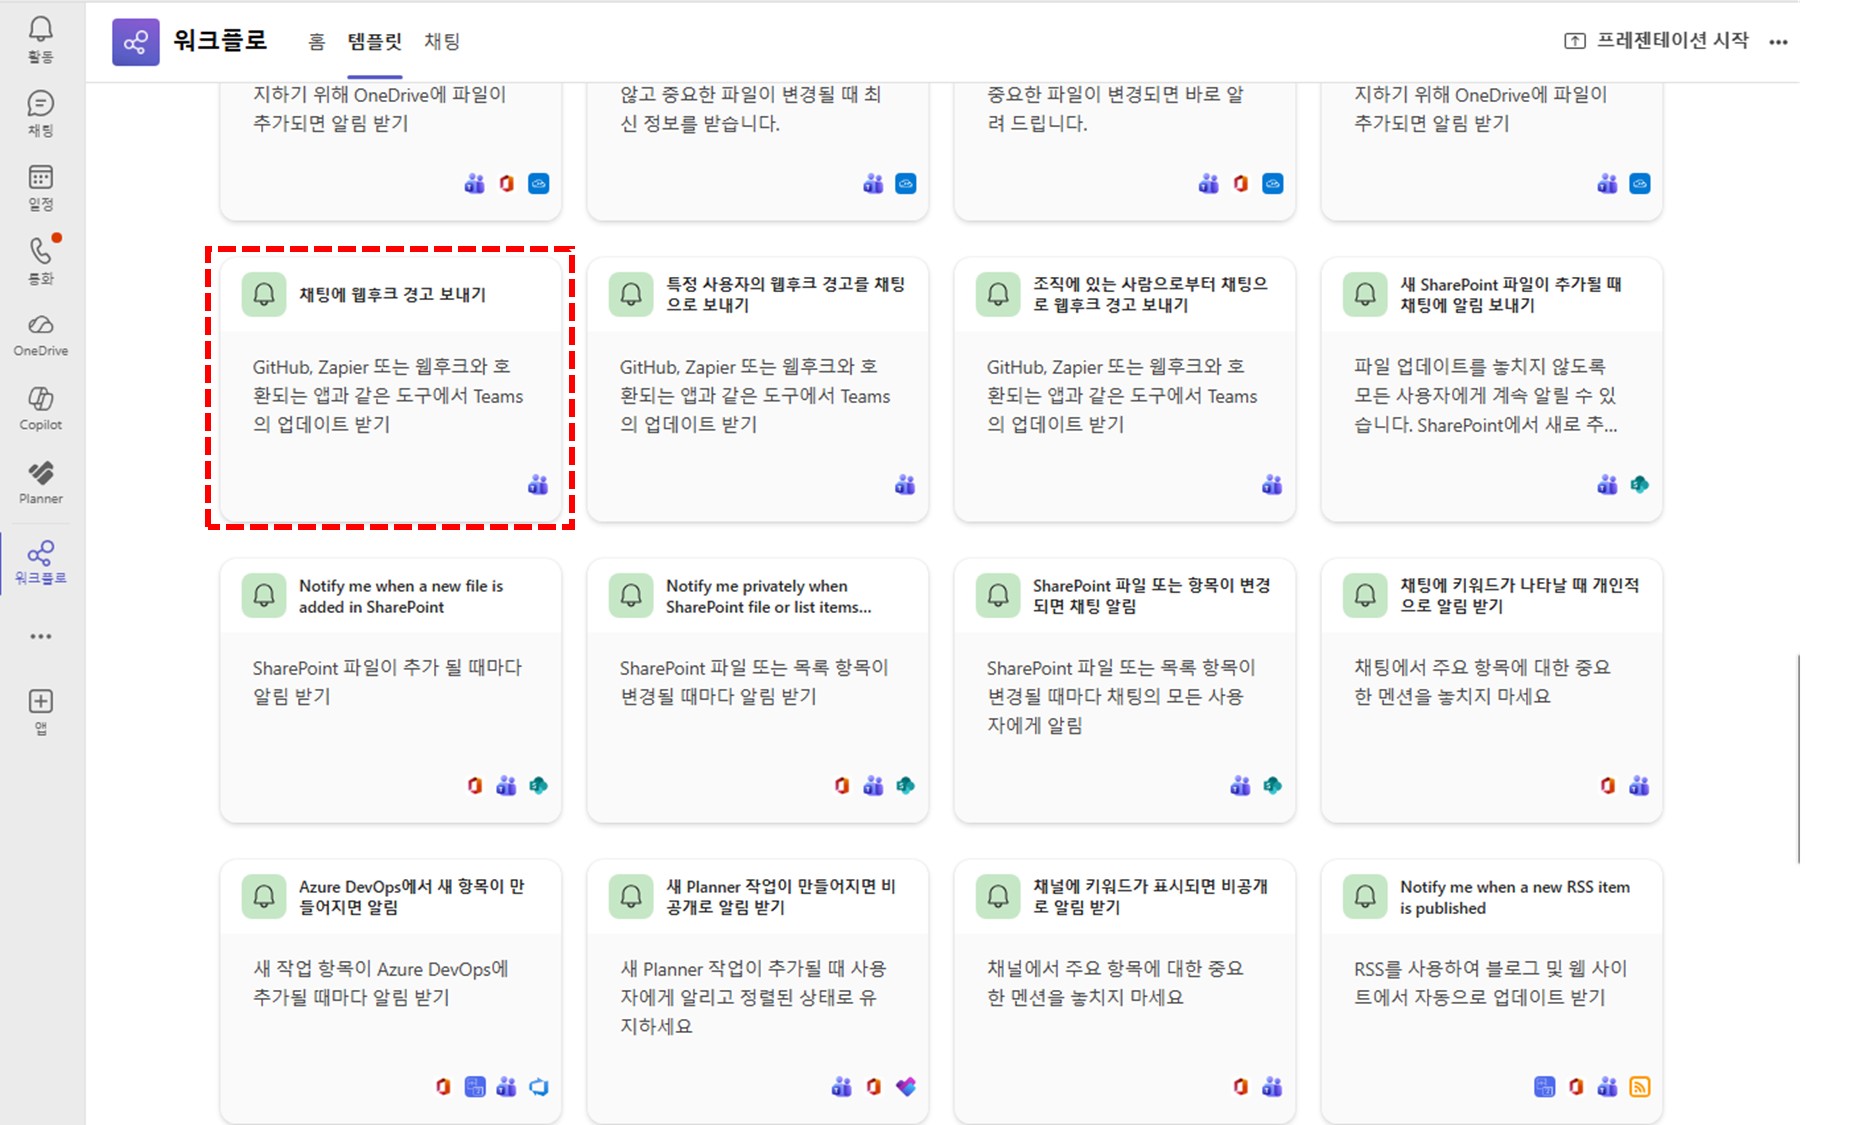
- In the template's parameter setup screen, select the chat you prepared and click Save.
- Once the workflow is created, click the "Copy webhook link" button to copy the Webhook URL to your clipboard.
Copying the webhook link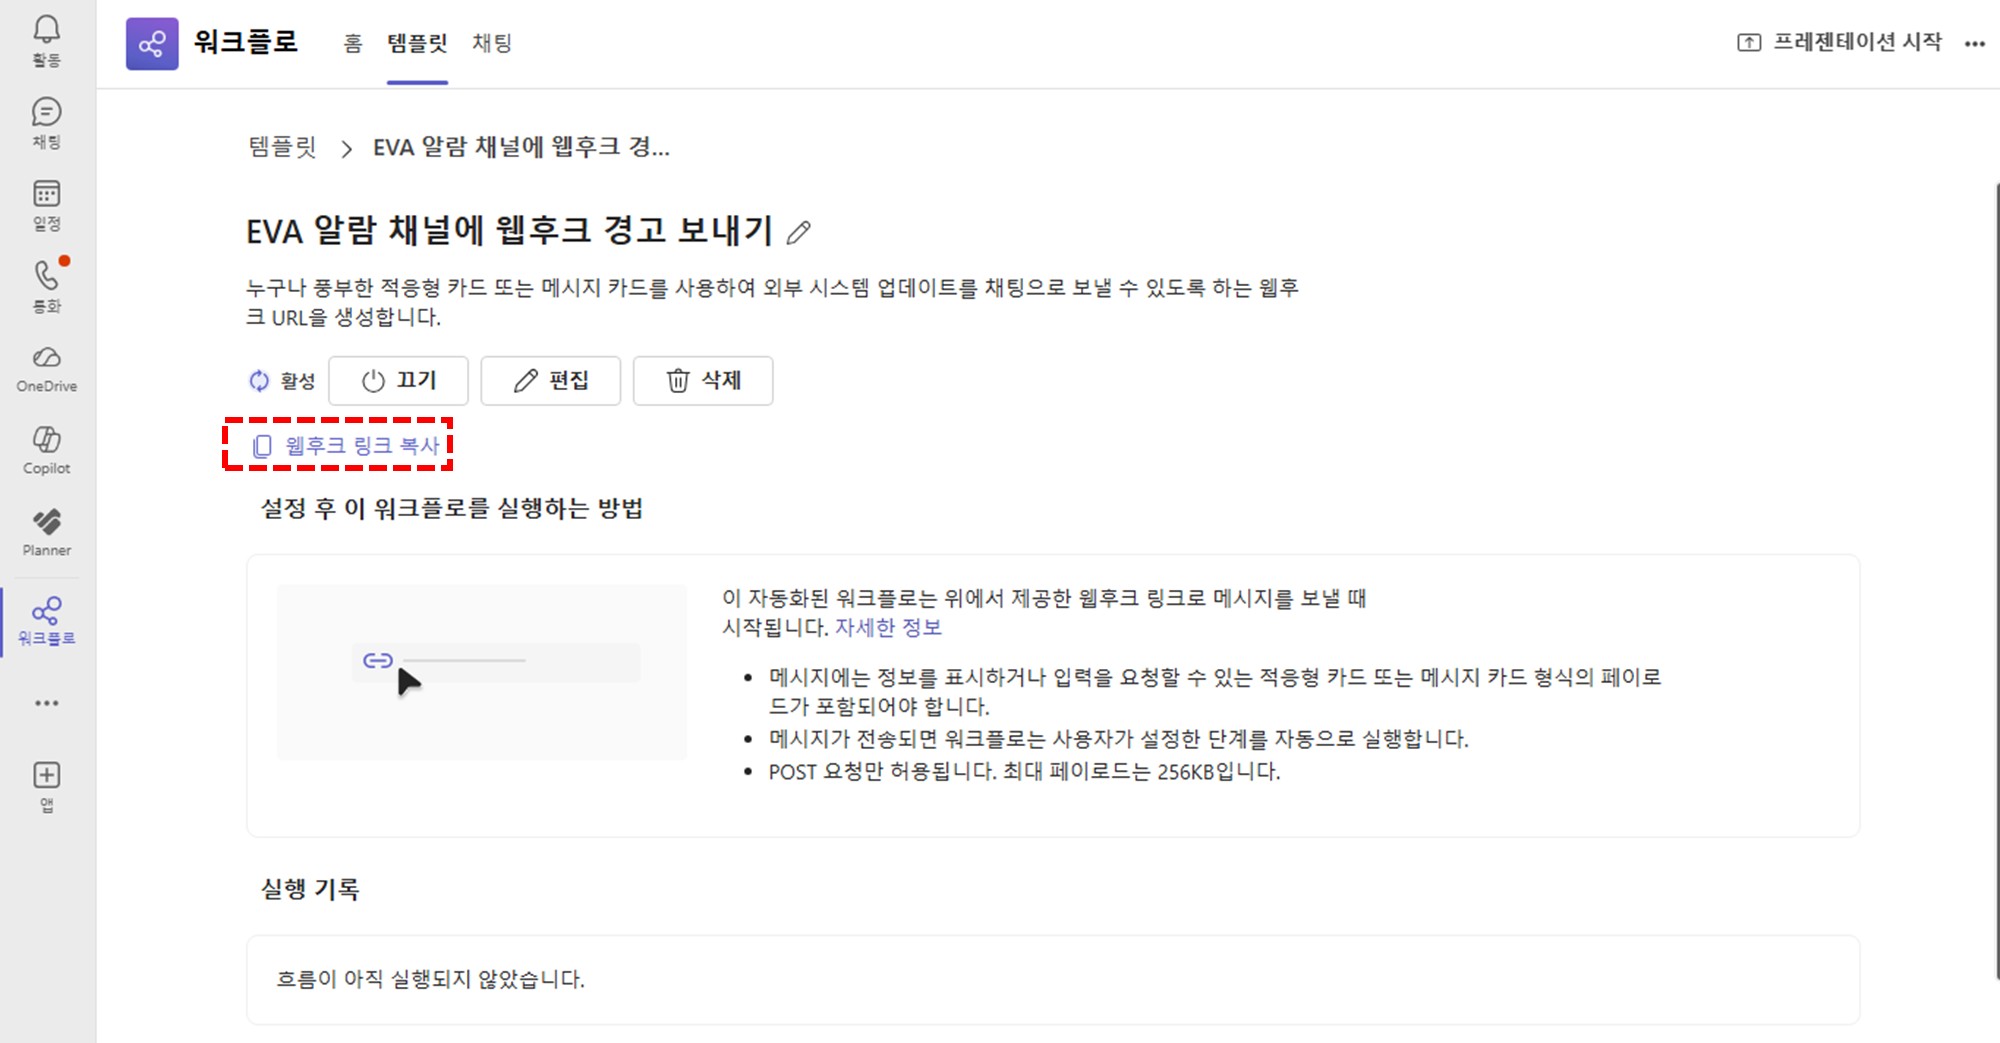
- Open Webhook settings in EVA
- Navigate to the monitoring page of the camera you want to configure
- Click the swirl icon in the top bar of the monitoring screen
- Enter the Webhook details
- When the Webhook settings panel opens, fill in the following
- Name: Enter a label for this alert (e.g., "Safety Team Channel")
- URL: Paste the Webhook URL copied from Teams
- Save
- Click "Save" to complete the Webhook configuration
- Confirm alert delivery
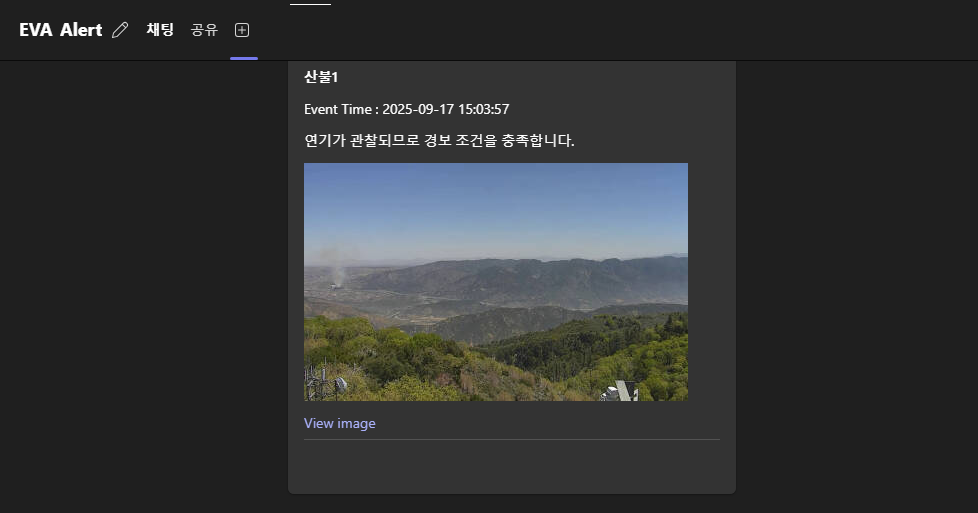
- When a detection event occurs, an alert is automatically sent to the configured Webhook
- Check the Teams chat for the incoming alert message
- The alert includes detection time, camera information, and a captured image
Slack Webhook Setup
- Create a Webhook Token in Slack
- First, create a channel in Slack to receive EVA notifications or select an existing channel.
- Click the "More actions" button at the top right of the channel and then click "Open channel details".
Open Channel Details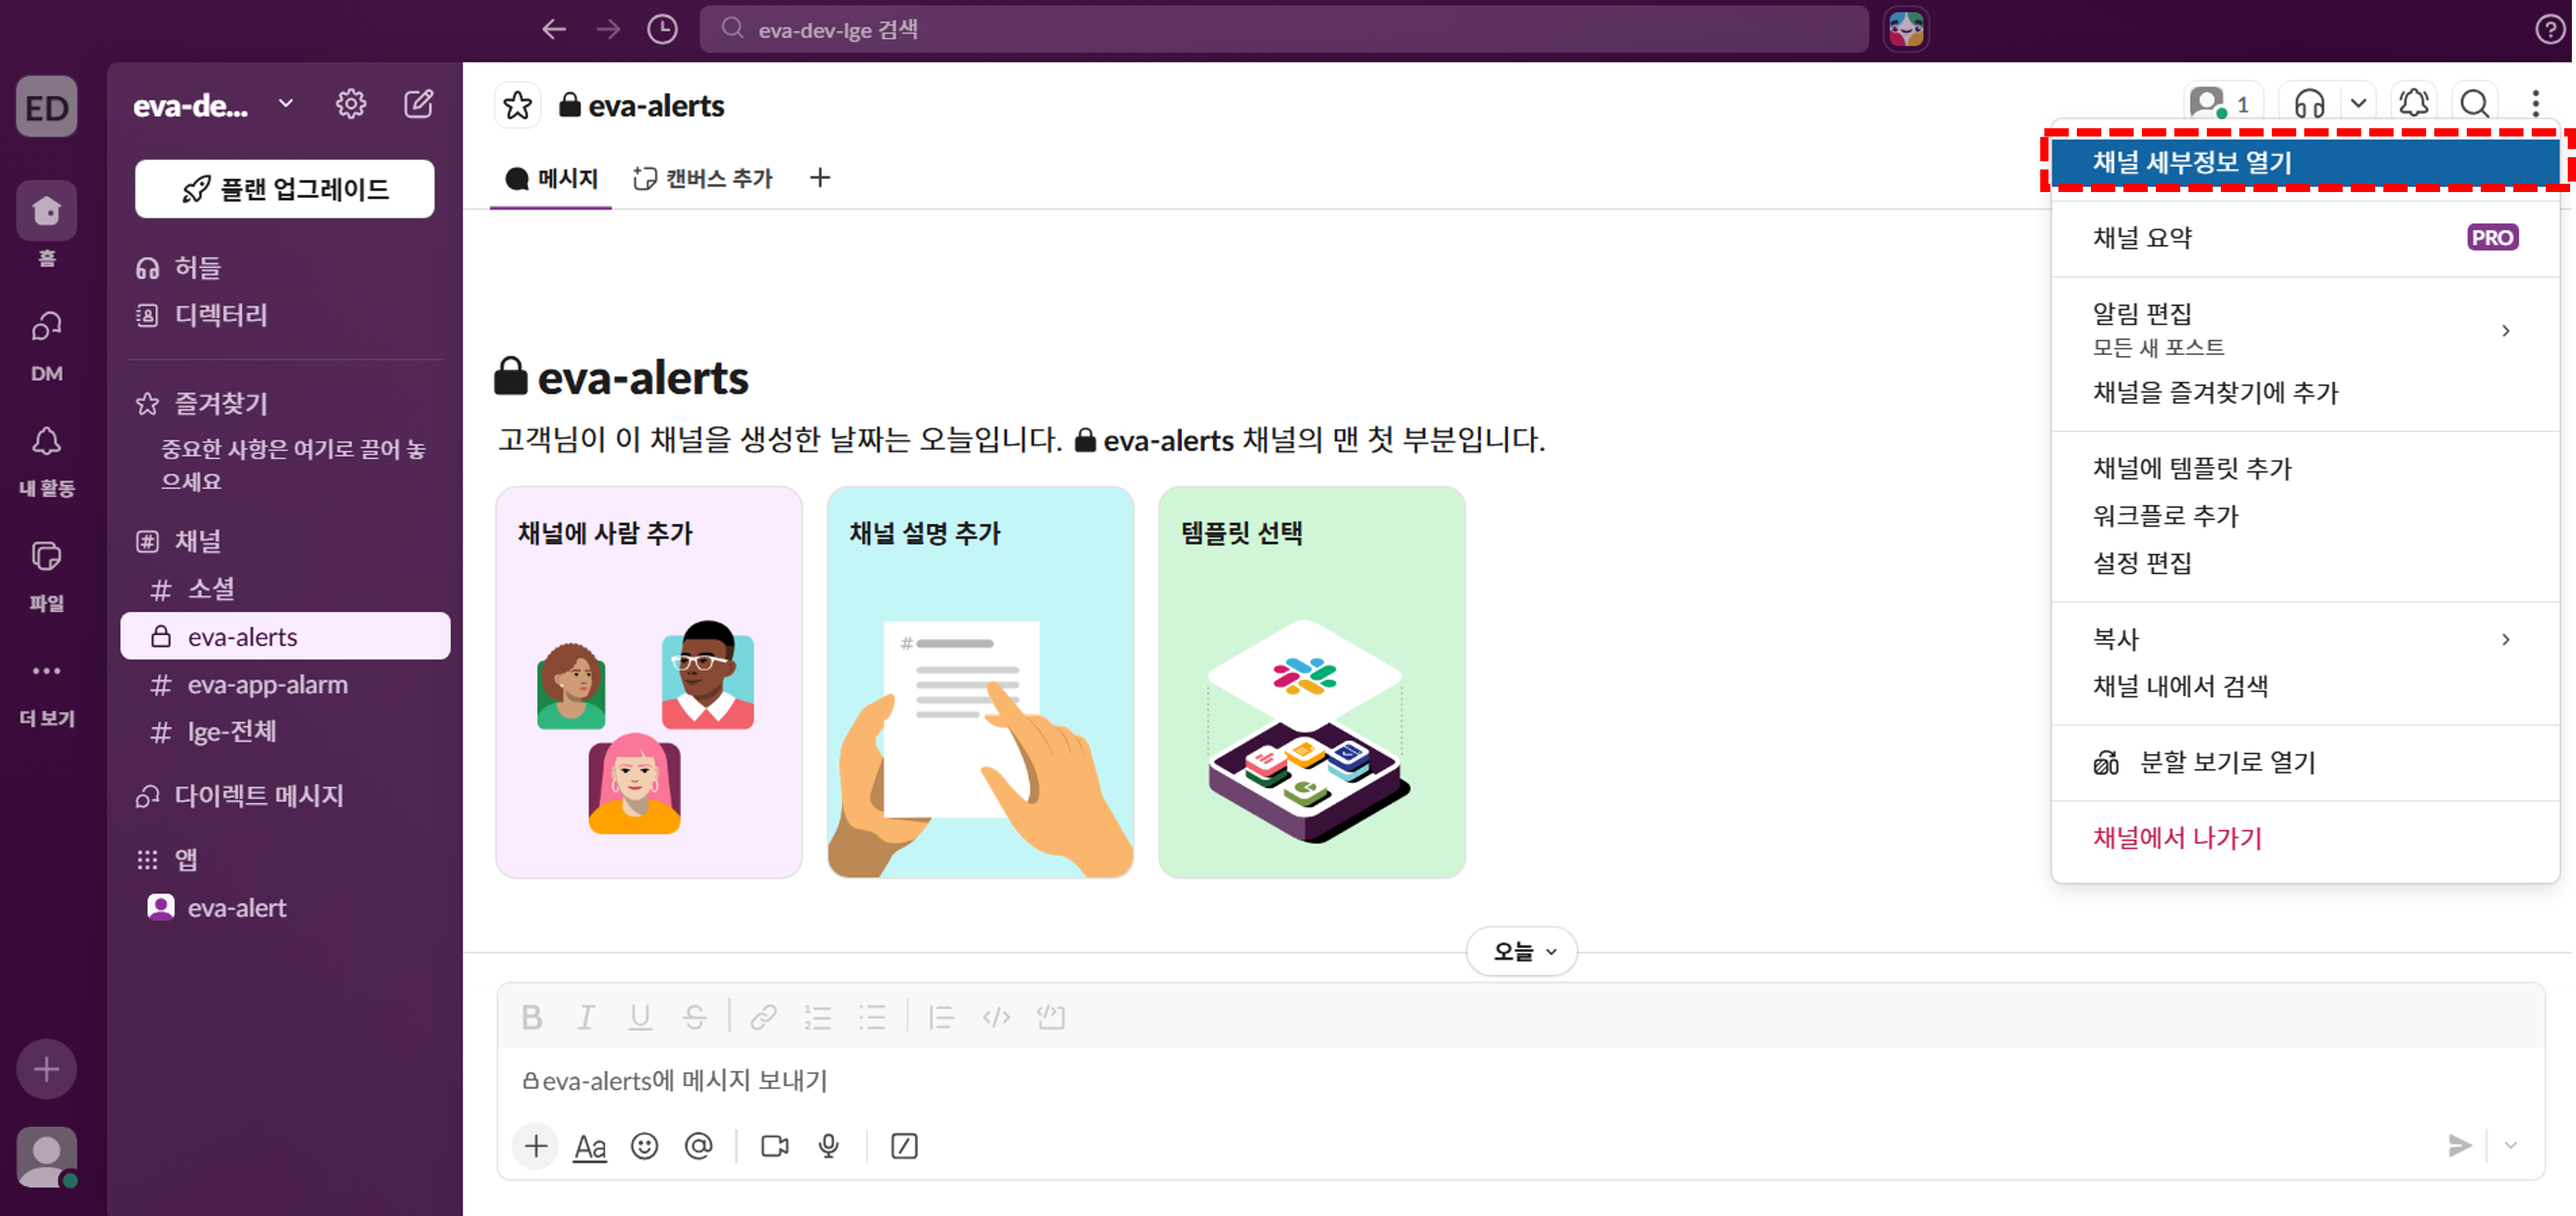
- Copy and save the Channel ID located at the bottom.
Copy Channel ID at the Bottom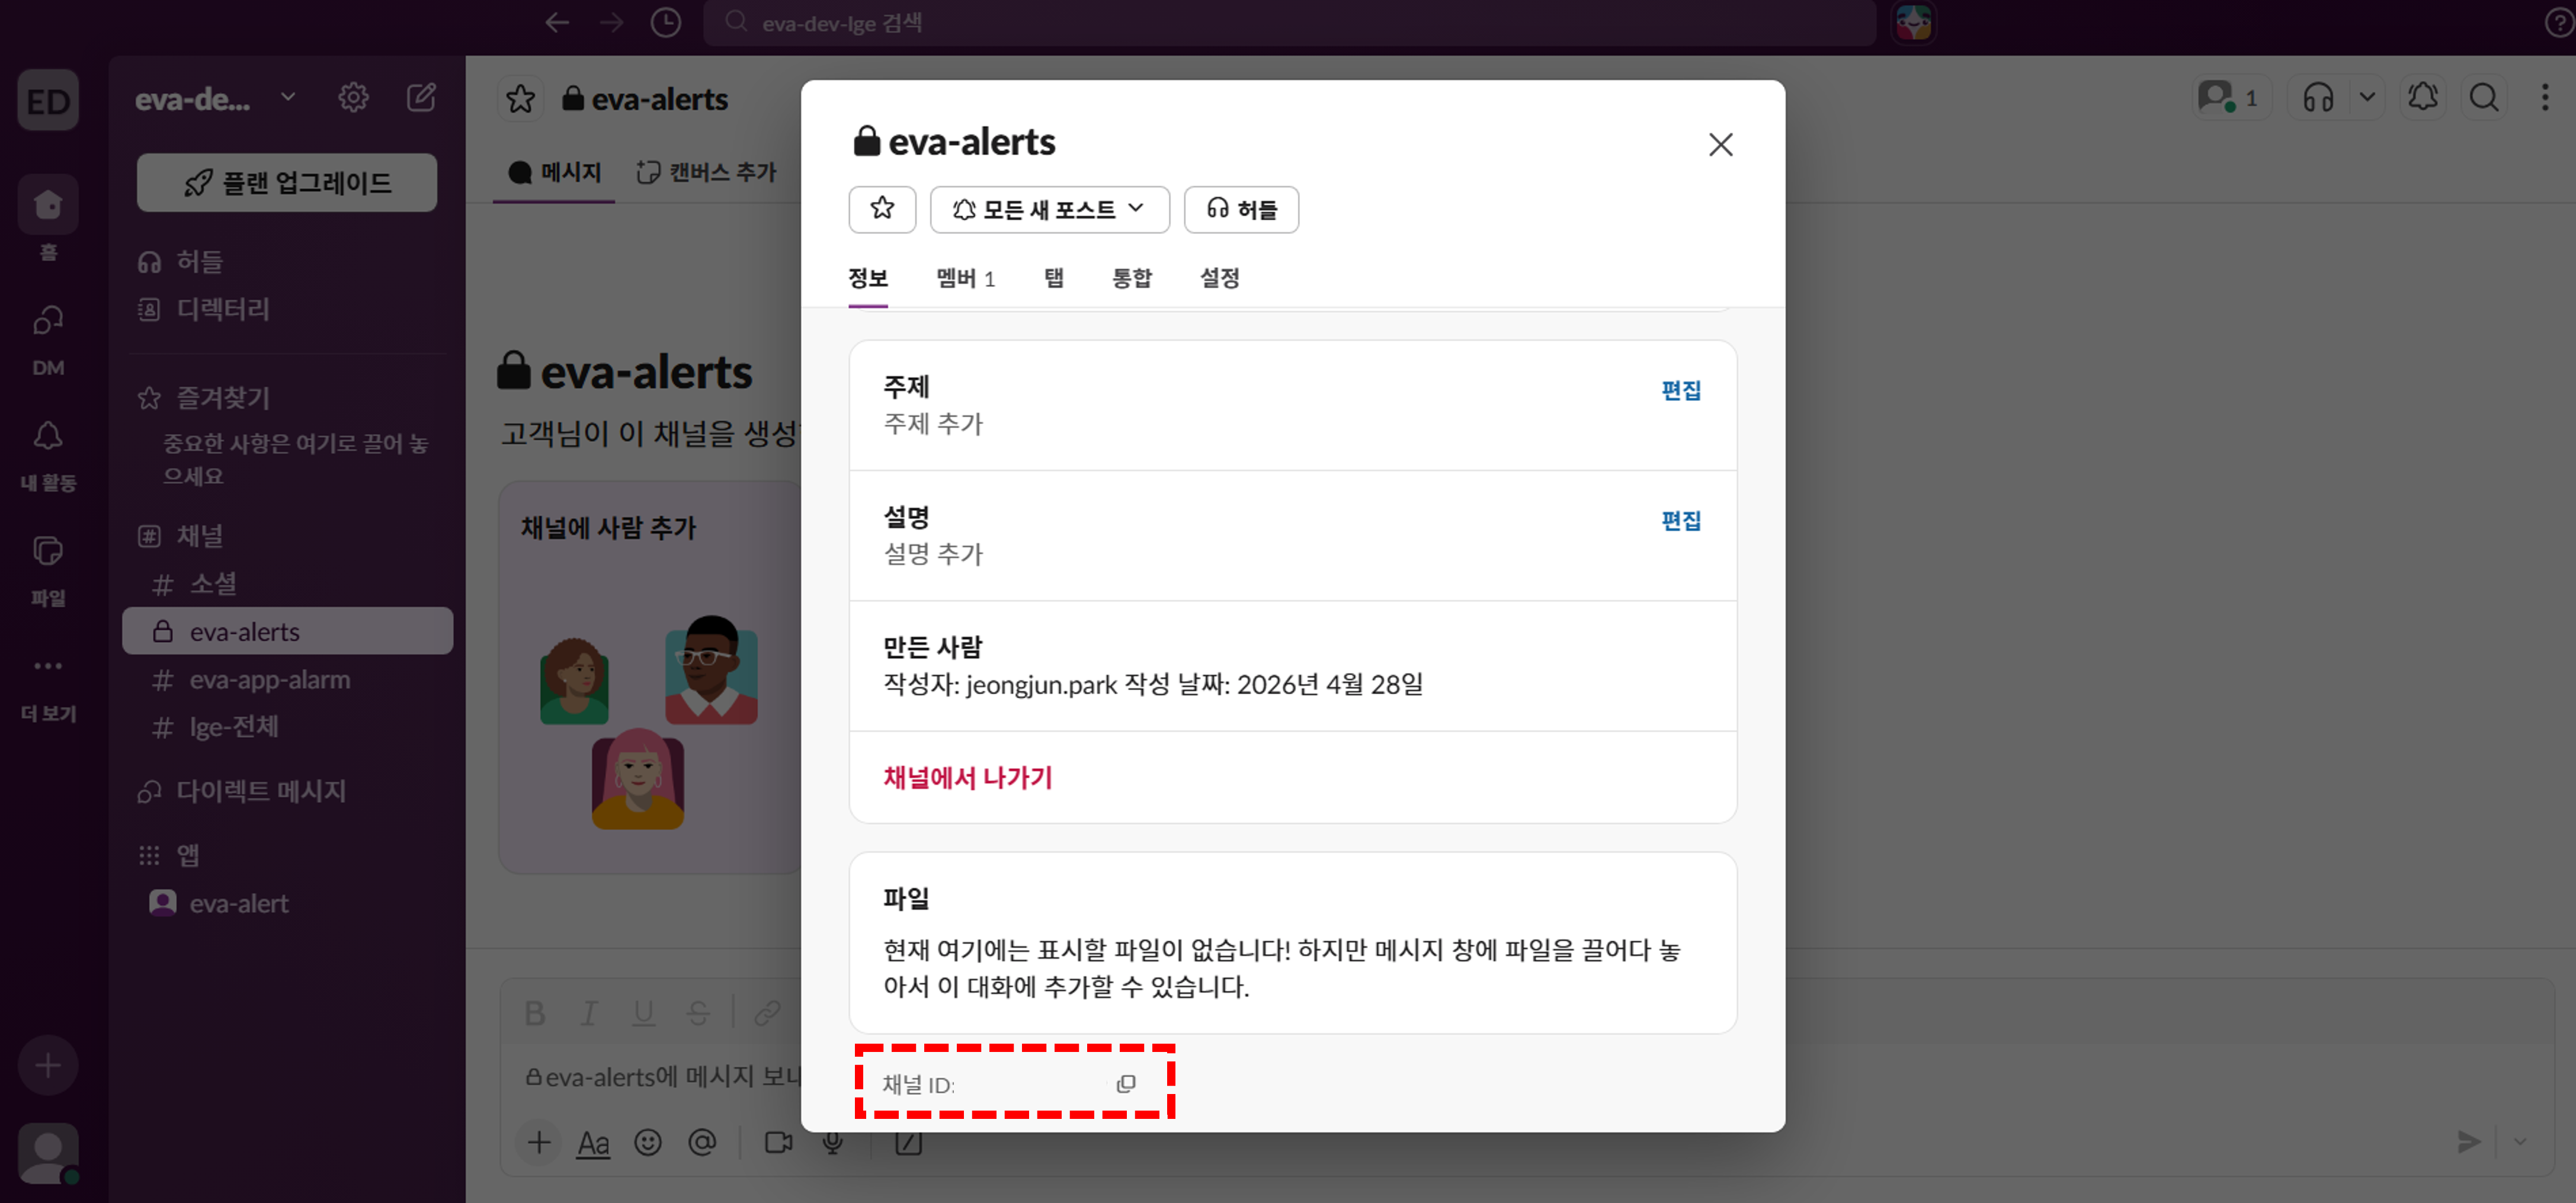
- Go to https://api.slack.com/apps.
- Click the Create New App button and select From scratch.
- Set the name of the app that will send notifications and select the workspace to use.
Set App Name and Workspace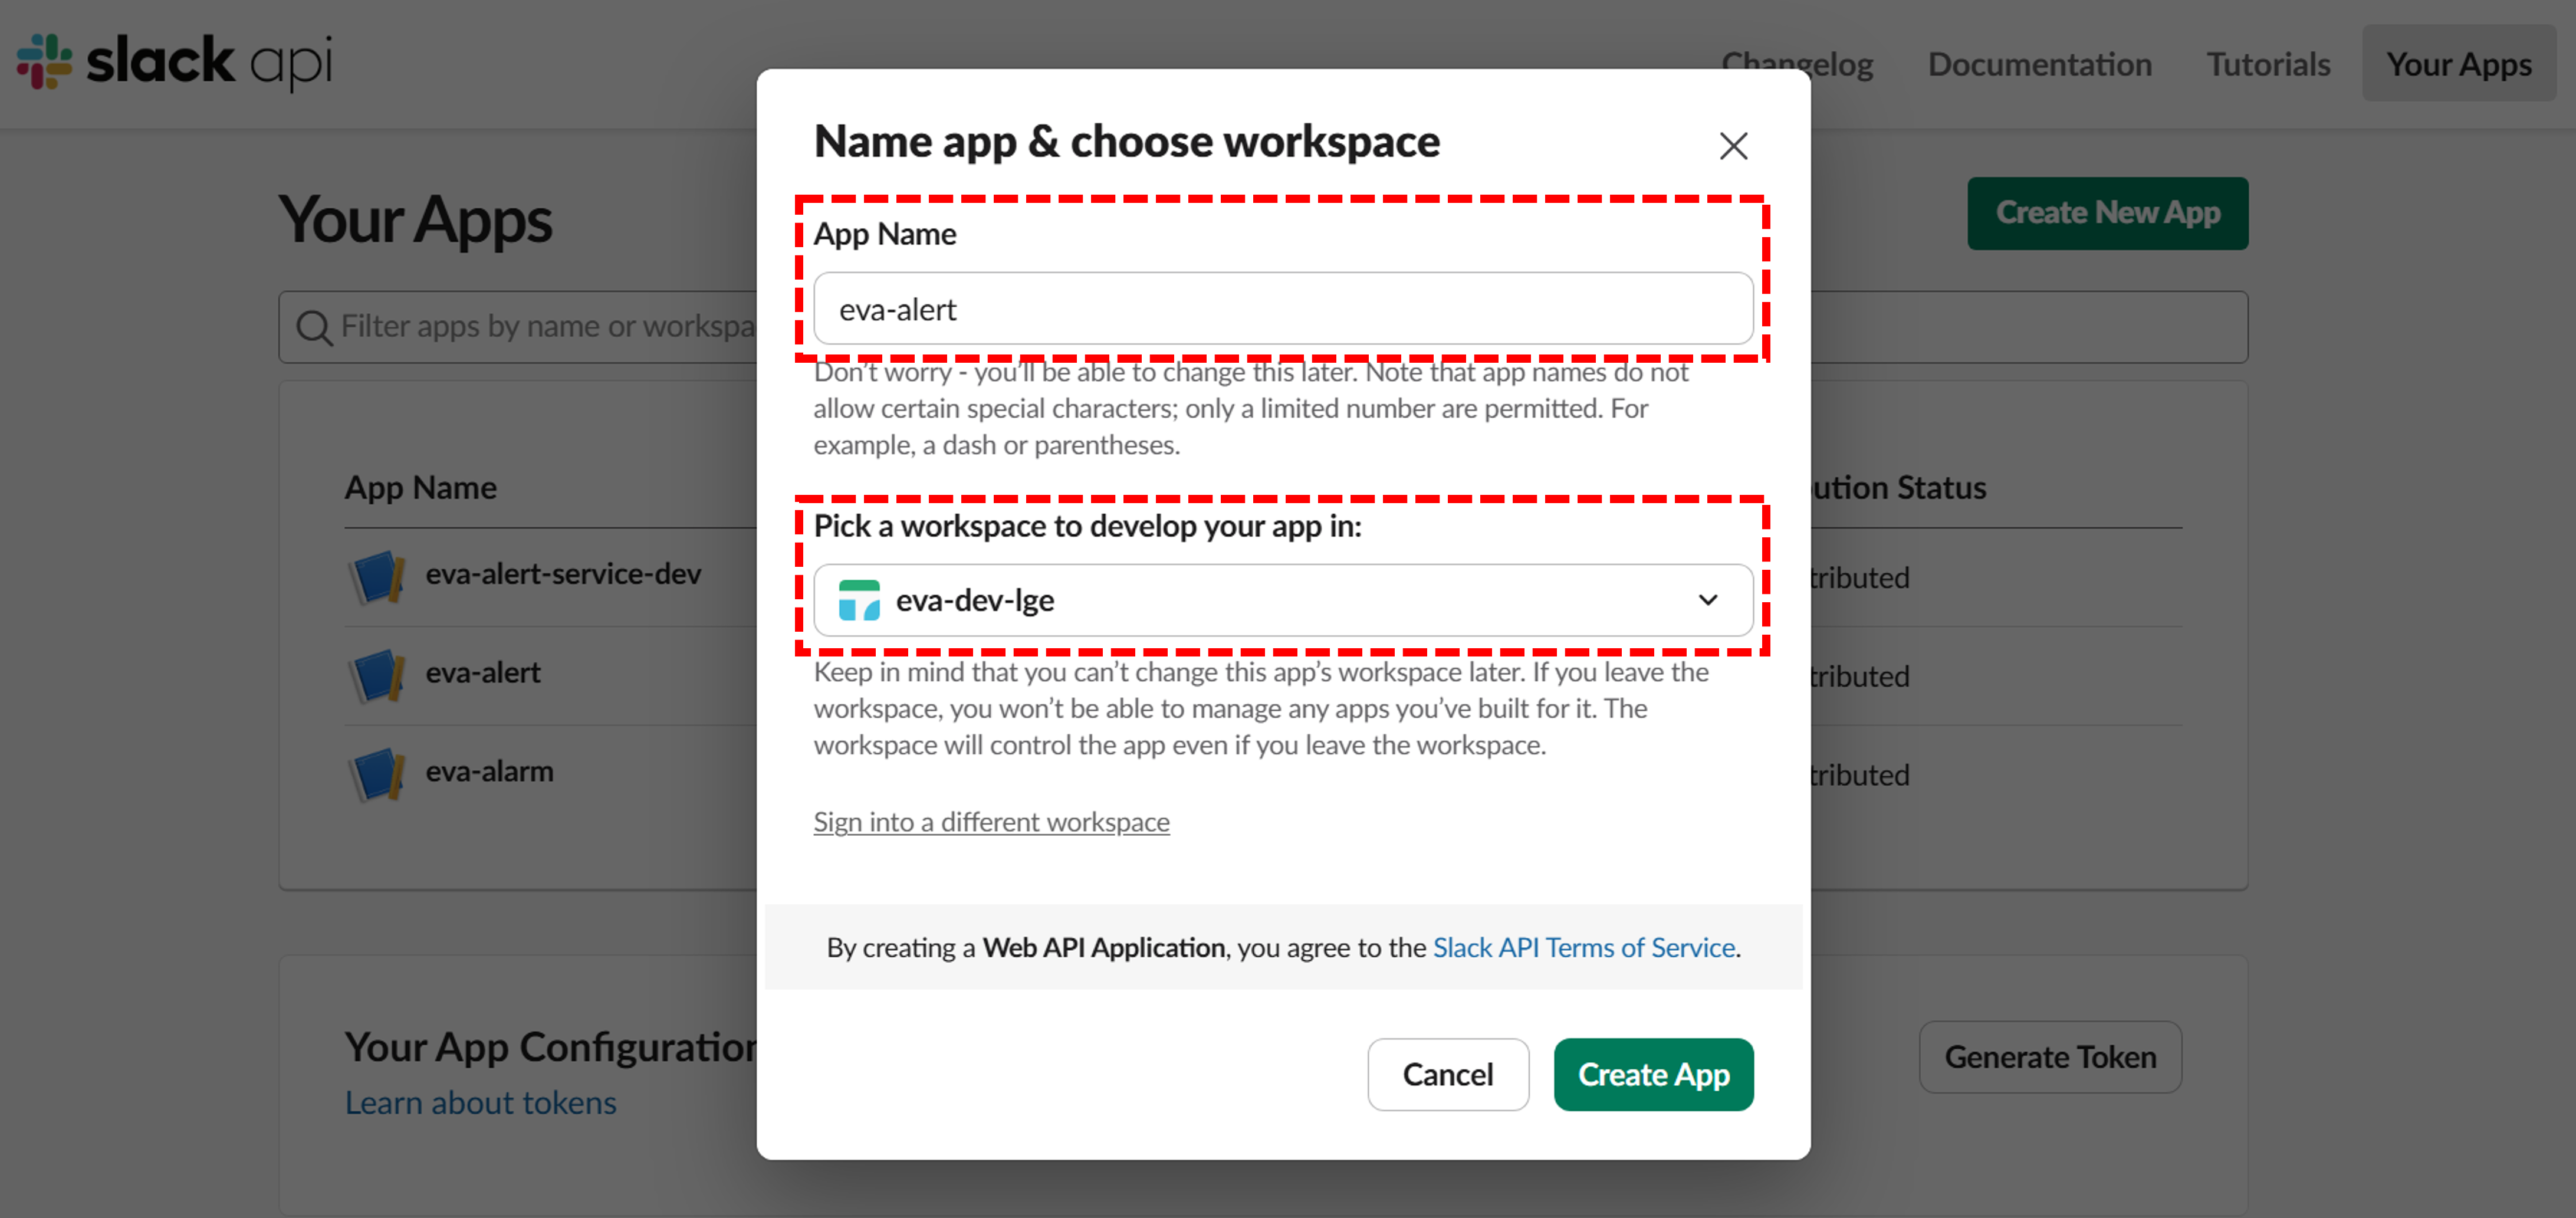
- To allow the created app to send messages to the channel, add the following permissions in OAuth & Permissions.
- If the channel is public, add the channels:join, chat:write, files:write permissions.
Configure App Permissions for Public Channels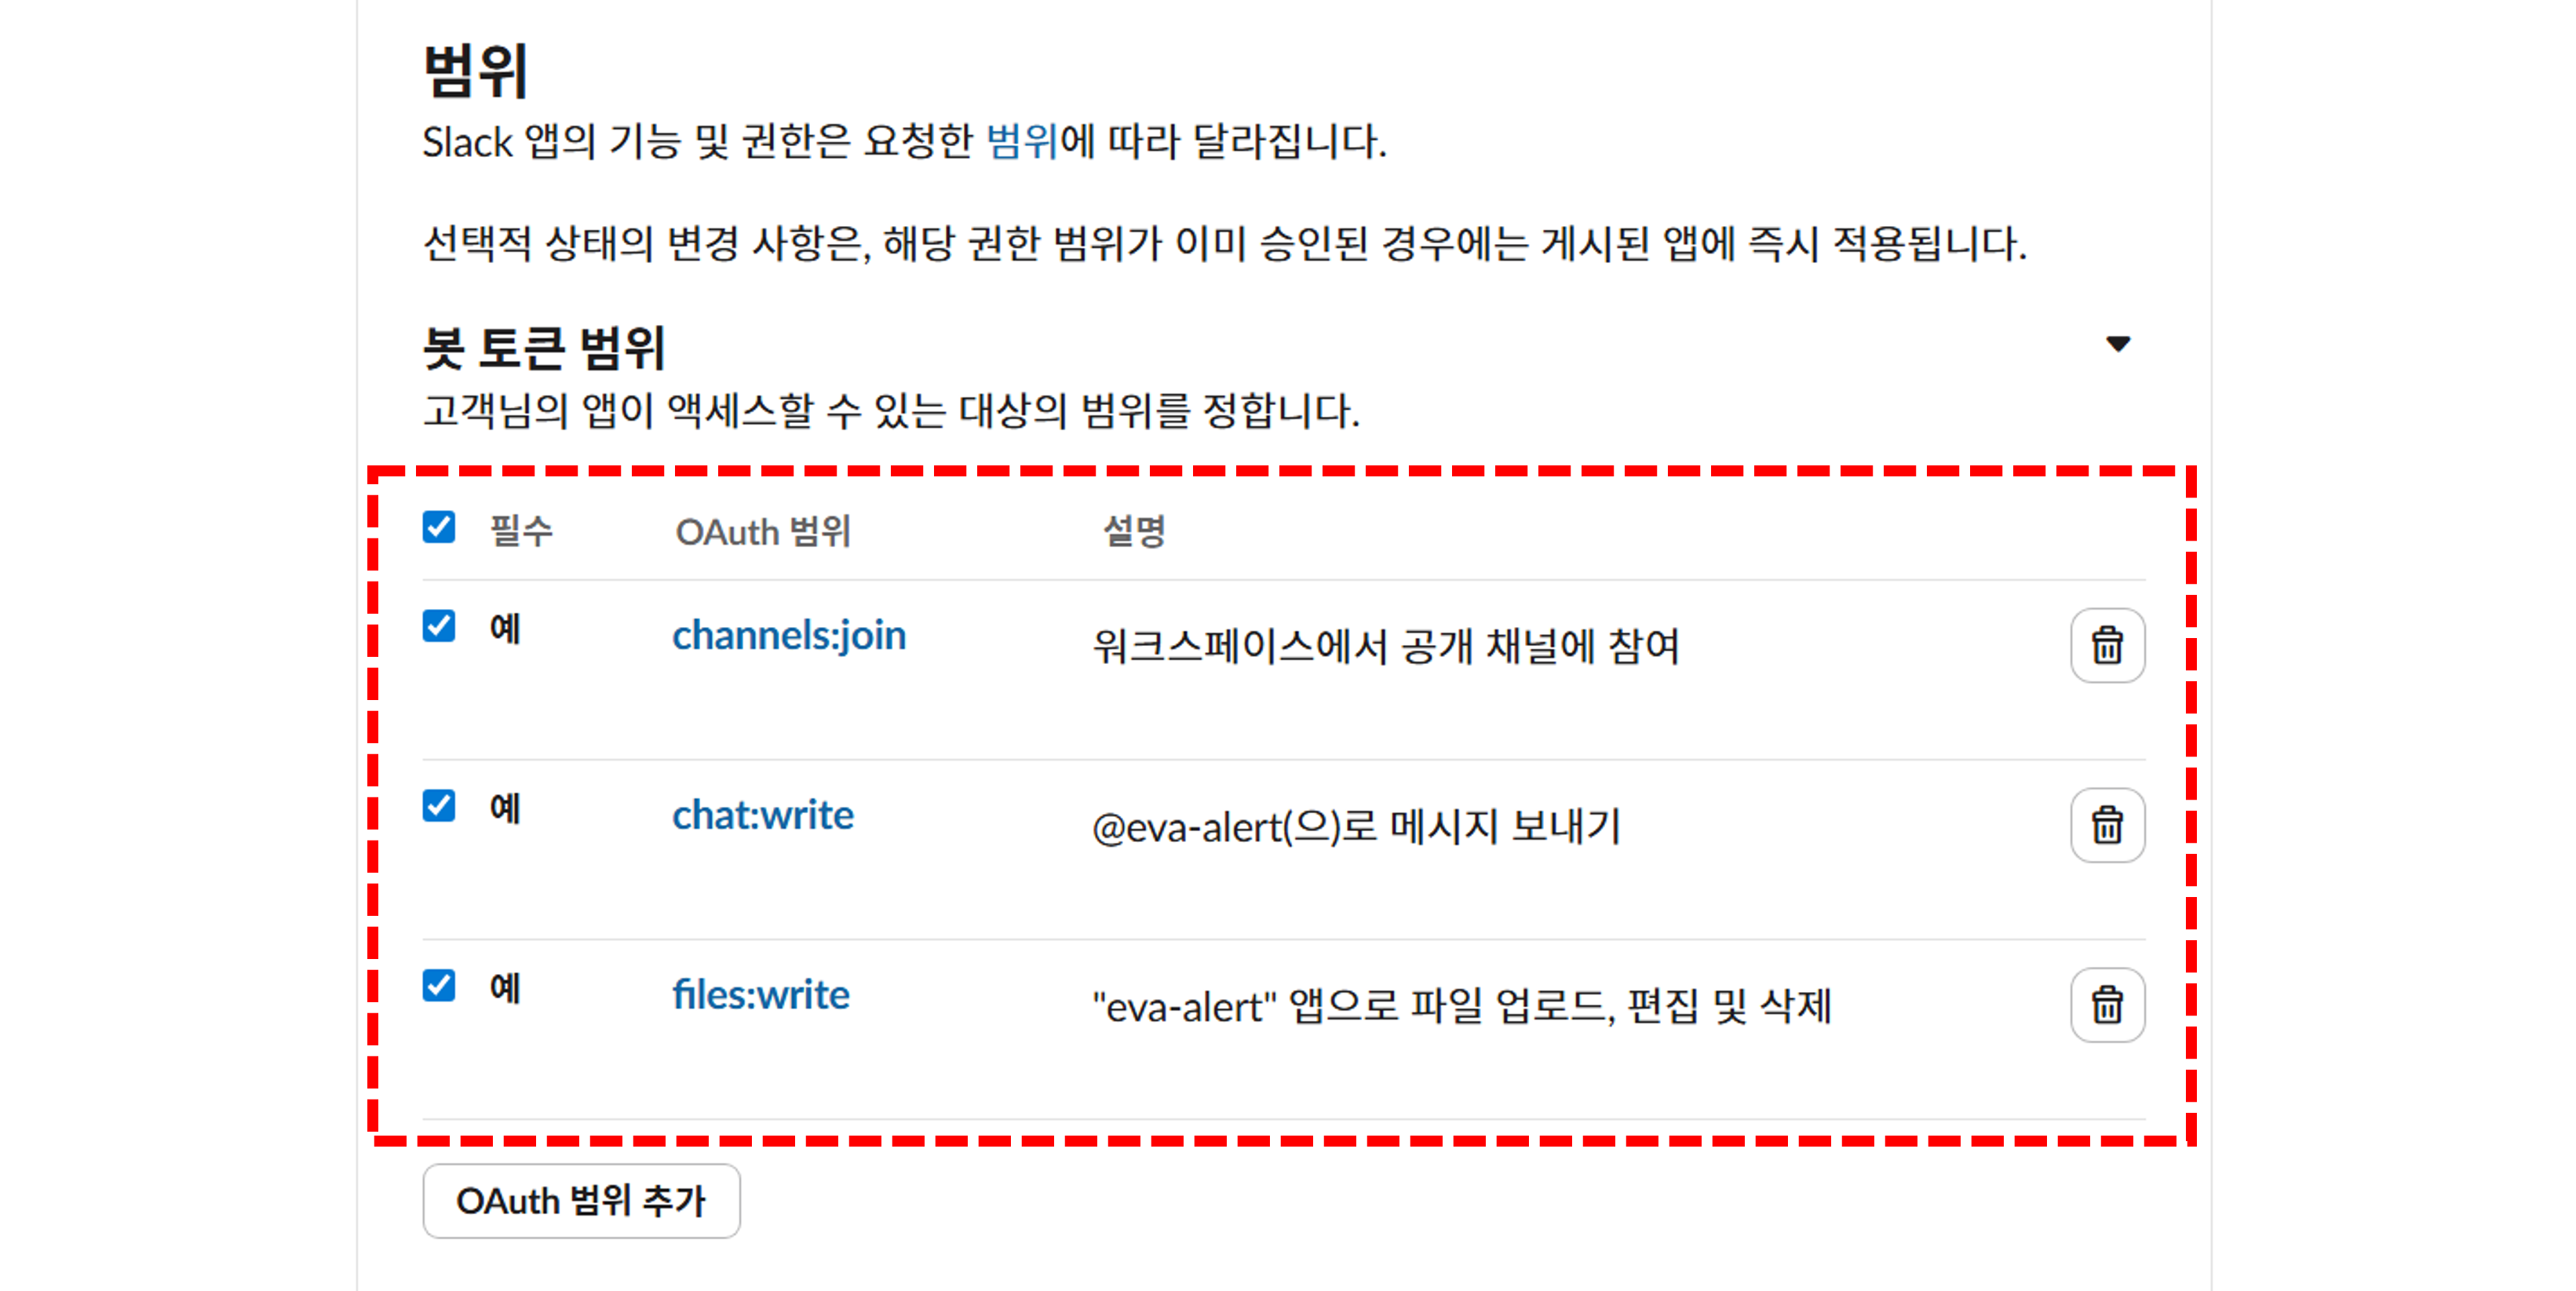
- If the channel is private, add the chat:write, files:write, groups:read, groups:write permissions.
Configure App Permissions for Private Channels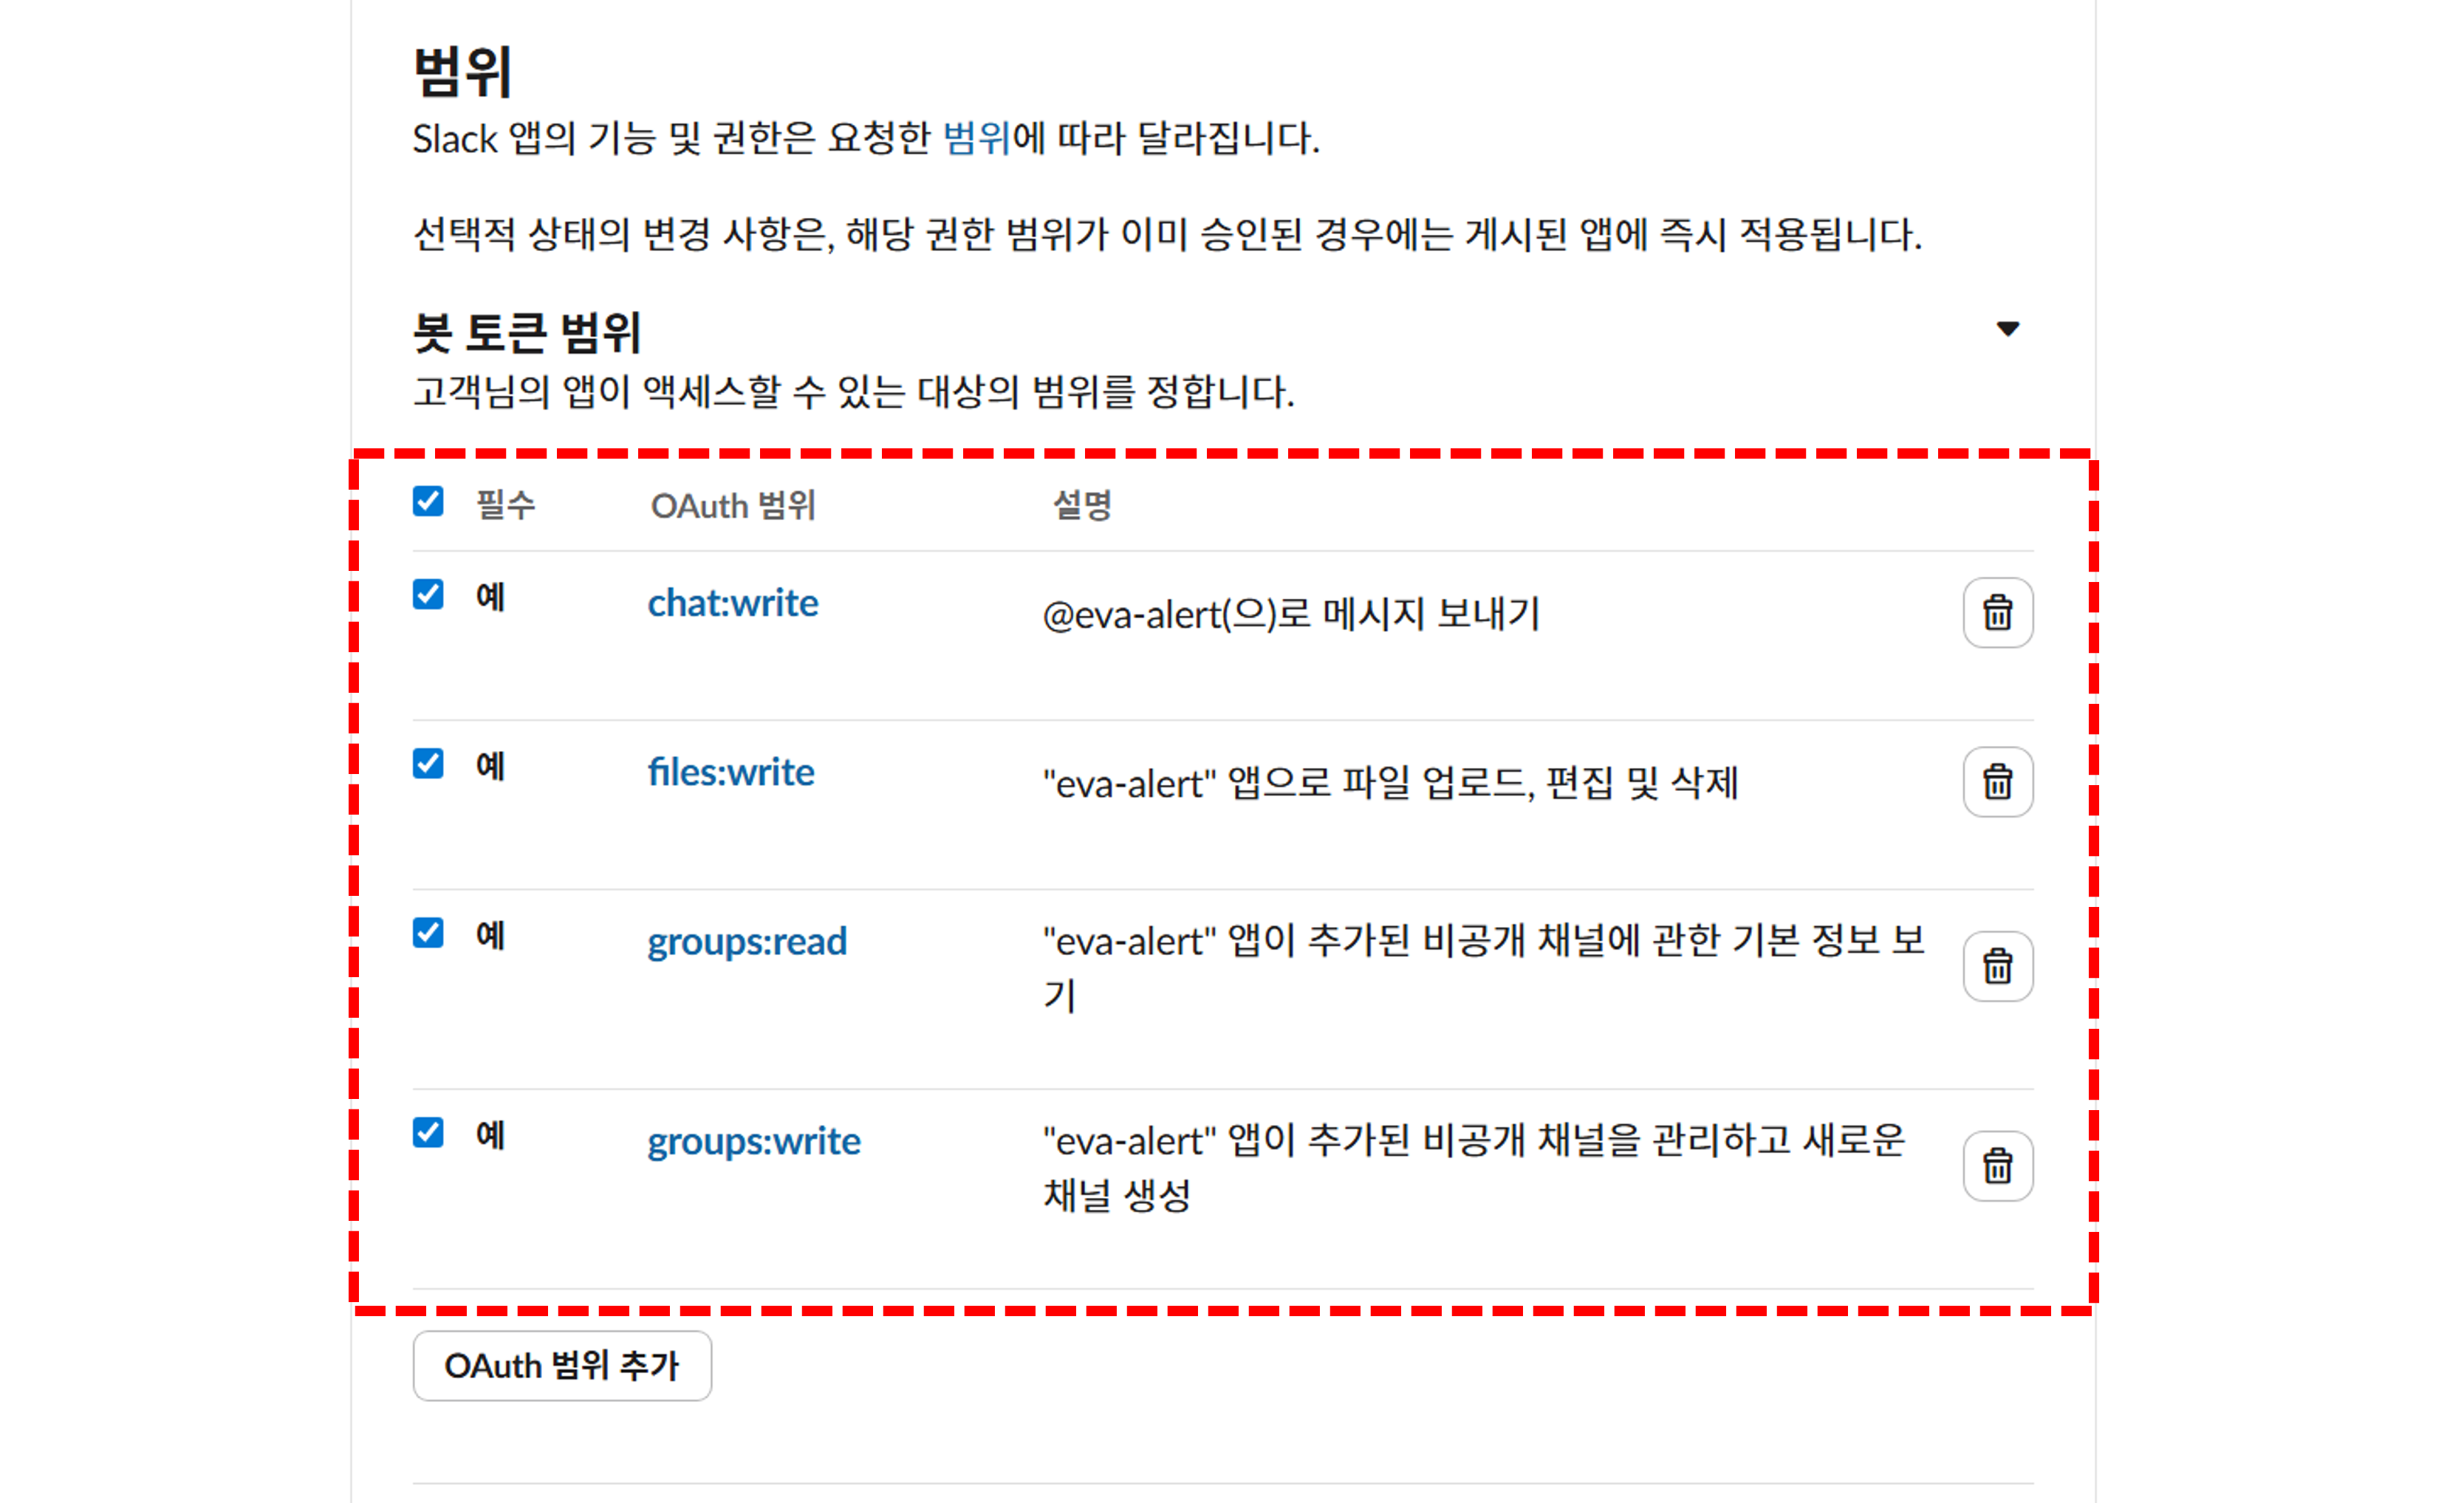
- After adding permissions, click install to workspace under OAuth Tokens and allow access.
Install App to Workspace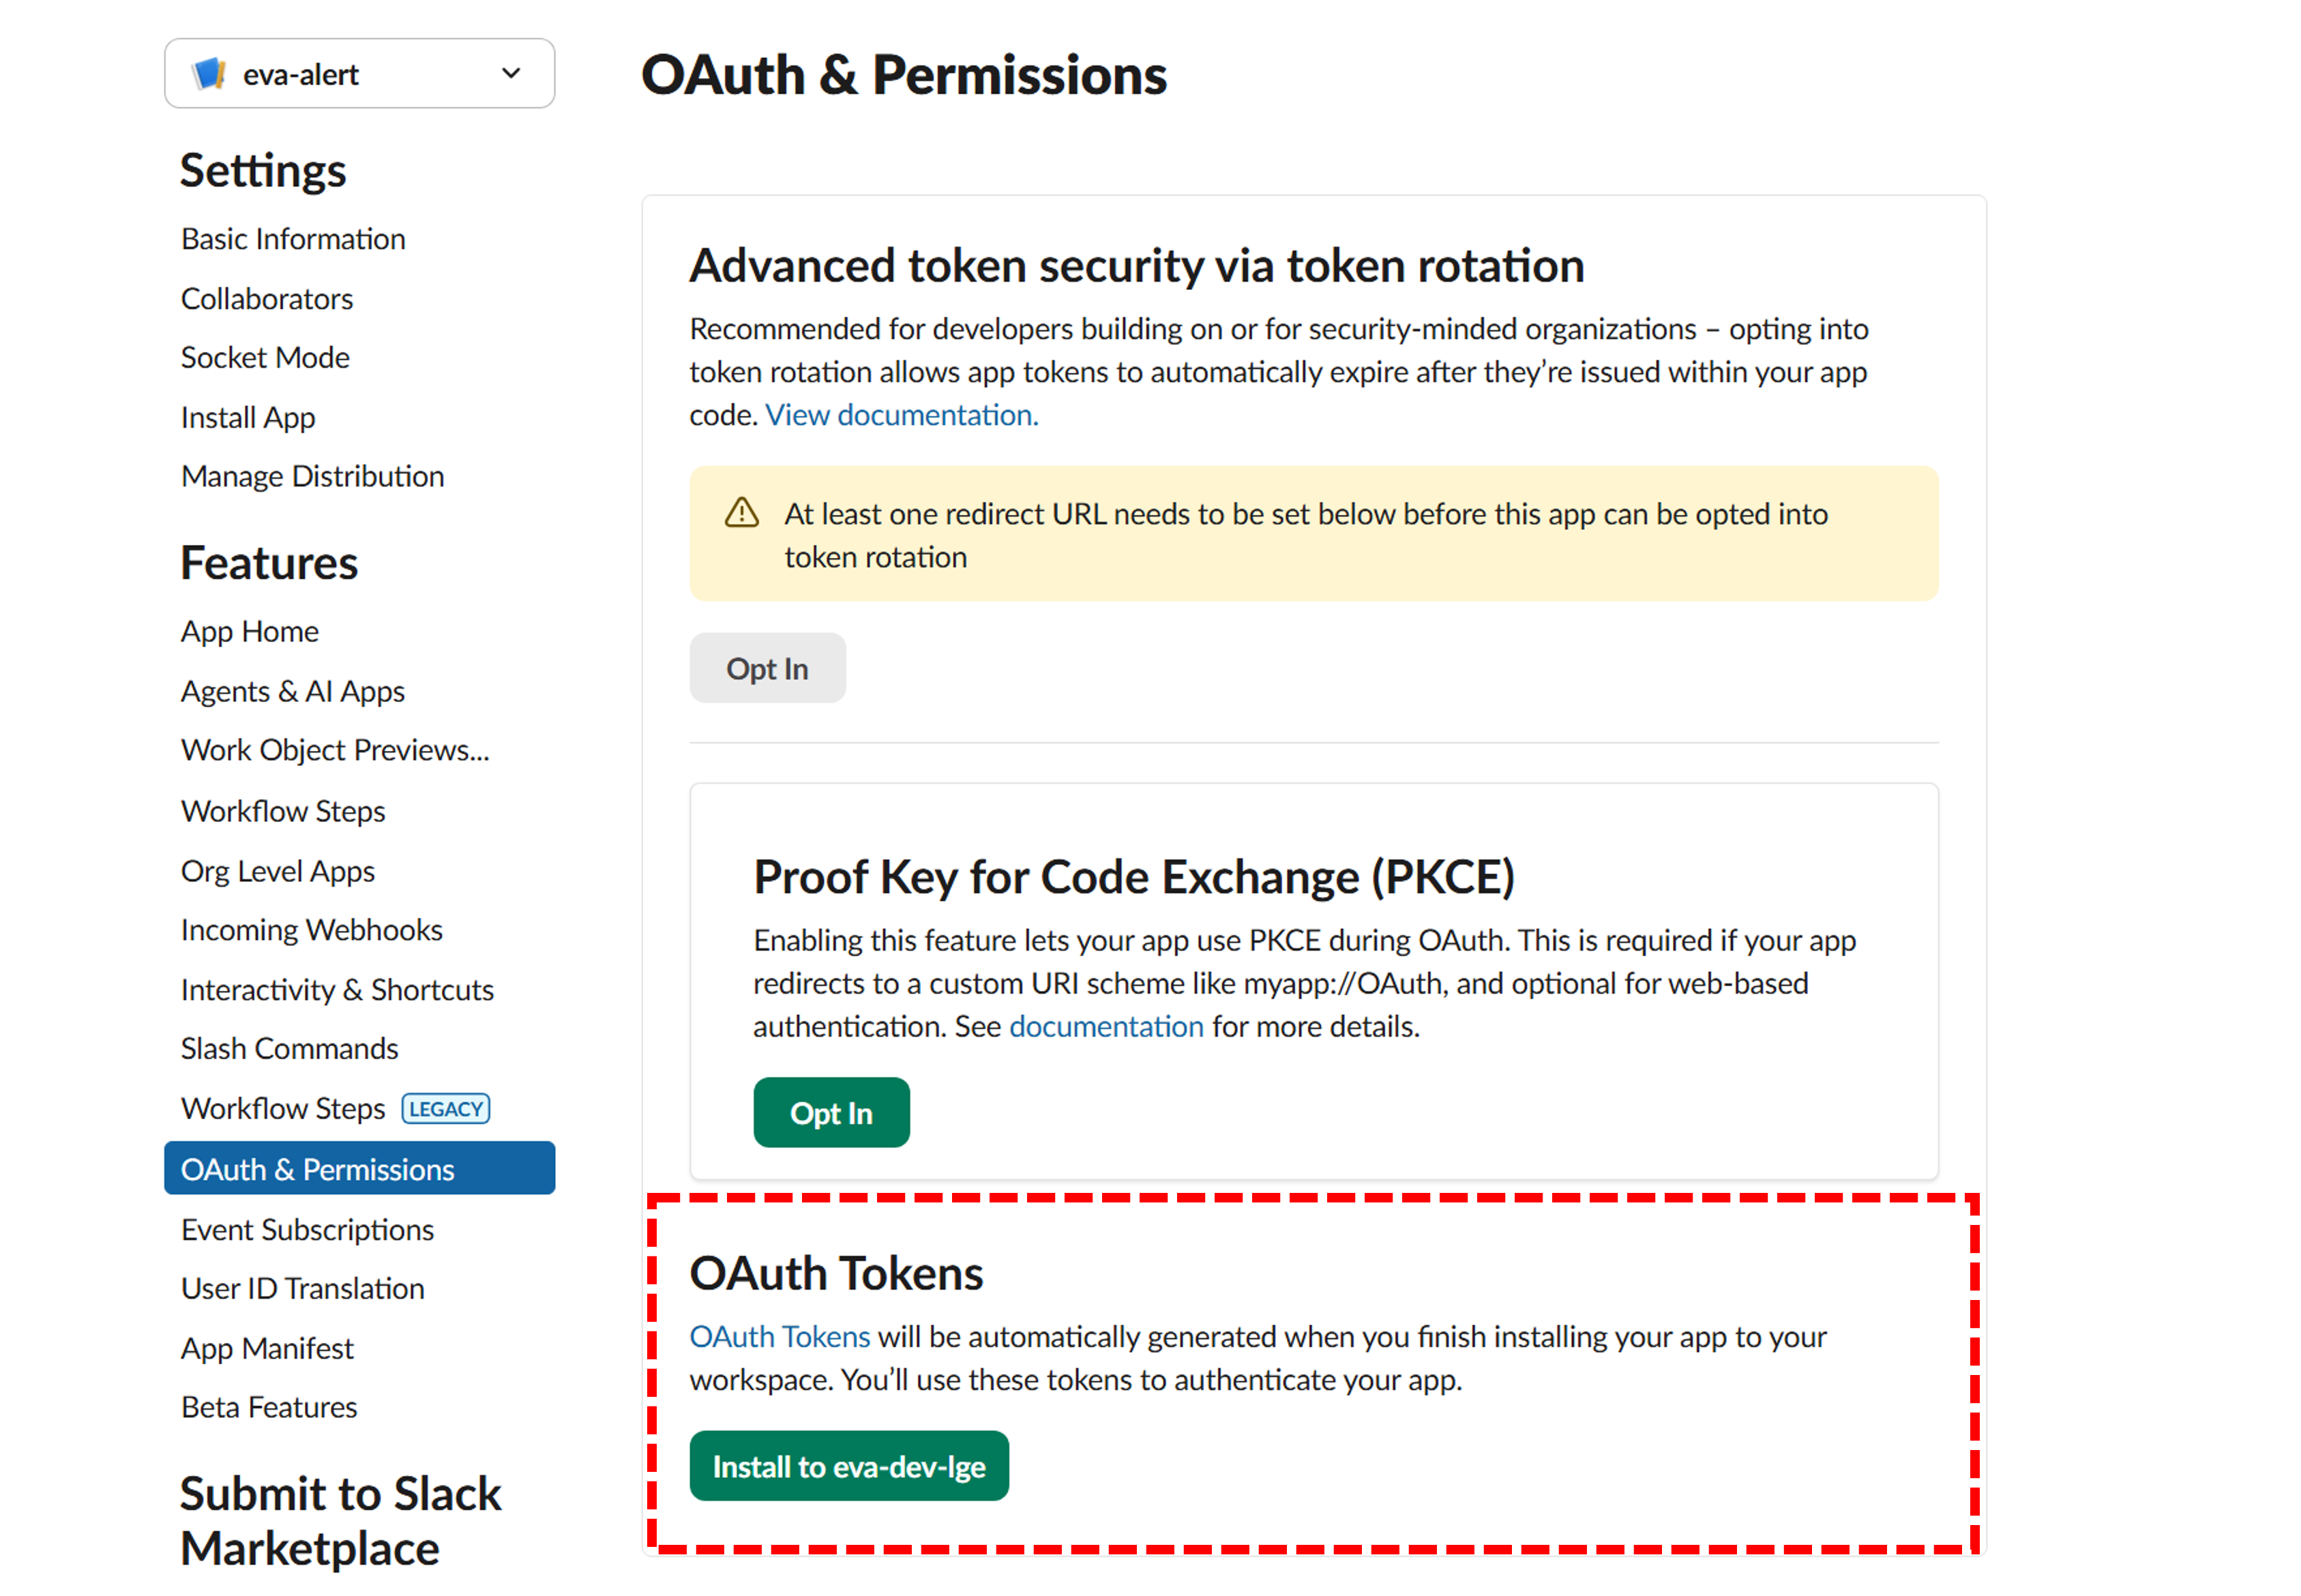
- Copy and save the generated OAuth Tokens.
- If the channel is private, invite the app by typing /invite @app_name in the channel chat.
Invite App to Private Channel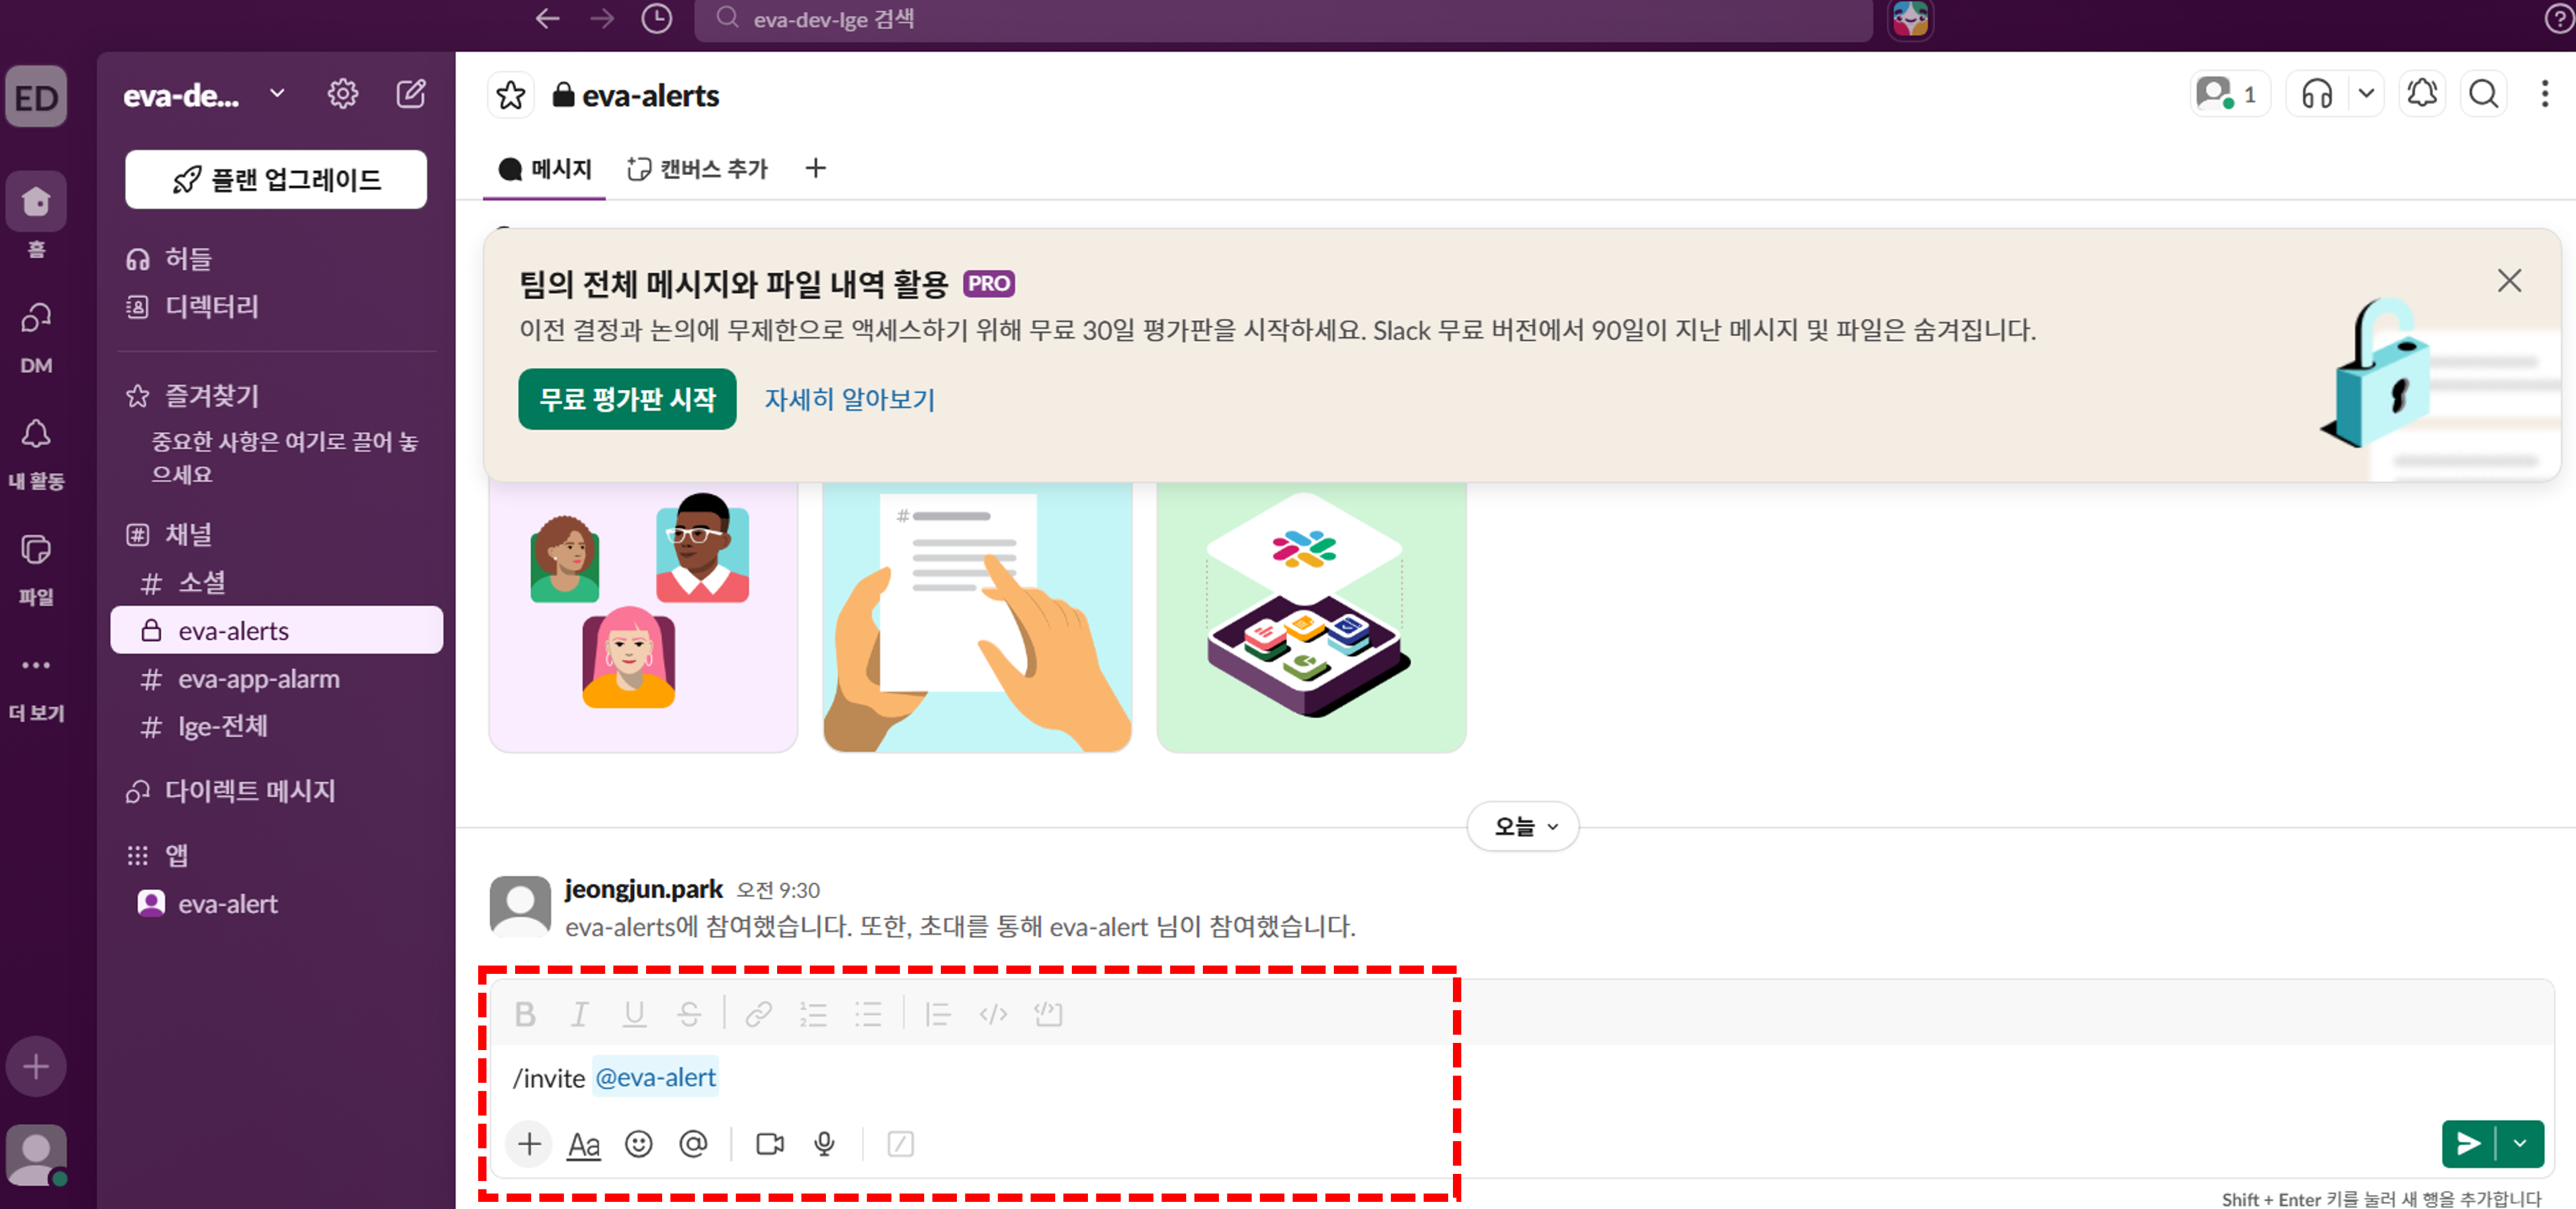
- Open Webhook Settings in EVA
- Navigate to the monitoring page of the camera you want to configure.
- Click the swirl icon in the top bar of the monitoring screen.
- Enter Slack Webhook Information
- When the webhook settings window opens, enter the following information.
- Bot Token: Enter the generated OAuth Token. (e.g., "xoxb-10...")
- Channel ID: Enter the ID copied from the channel details. (e.g., "C0A...")
- Name: Enter a name for the notification (e.g., "Safety Team Slack Channel").
- Open Webhook settings in EVA
- Navigate to the monitoring page of the camera you want to configure
- Click the swirl icon in the top bar of the monitoring screen
- Enter Slack Webhook Information
- When the webhook settings window opens, enter the following information.
- Bot Token: Enter the generated OAuth Token. (e.g., "xoxb-10...")
- Channel ID: Enter the ID copied from the channel details. (e.g., "C0A...")
- Name: Enter a notification name (e.g., "Safety Team Slack Channel")
- Save
- Click "Save" to complete the Webhook configuration
- Confirm alert delivery
- When a detection event occurs, an alert is automatically sent to the configured Webhook
- Check the Slack chat for the incoming alert message
- The alert includes detection time, camera information, and a captured image
Set Emergency Alert Types
Step Description
Emergency Alert Types let you flag specific detection scenarios that require immediate attention. Alerts matching these types are displayed more prominently than standard alerts, making critical situations instantly recognizable. Note that Emergency Alert settings do not apply to VM Only detection types.
Actions
- Go to Settings
- Click "Settings" in the top navigation bar of the EVA main page
- Select Emergency Alert Types
- Click "Emergency Alert Types" from the settings menu
- Write the emergency scenario keywords
- Enter the scenarios that require emergency-level alerts, separated by commas
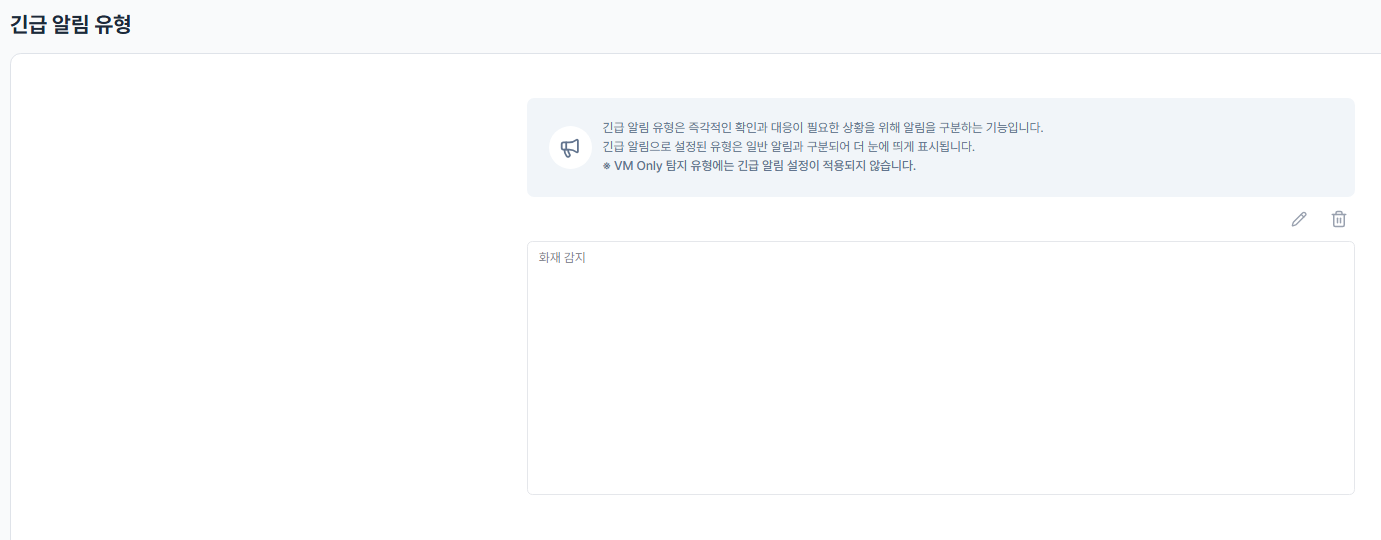
- Example:
Fire detection, Intrusion detection
- Save and verify auto-application
- After saving, scenarios related to these keywords will automatically be flagged as emergency alerts when applied to cameras
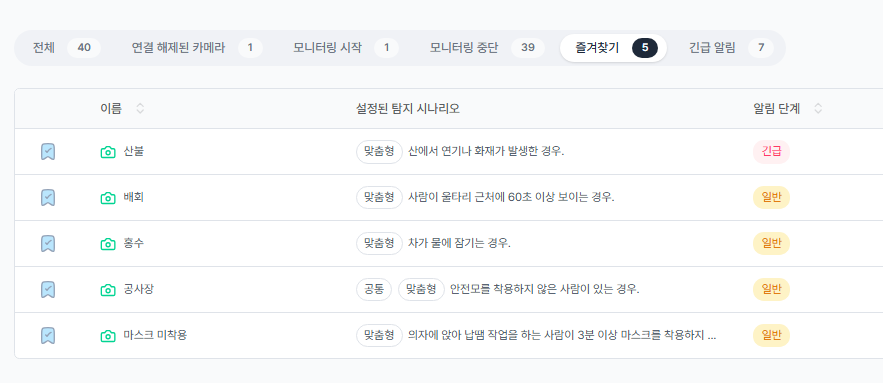
Camera Favorites
Step Description
When managing many cameras, add your most-visited ones to Favorites for fast access. Use the Favorites tab in the Camera List to filter and view only the cameras that matter most.
Actions
- Add to Favorites from the Camera List
- On the camera monitoring screen, click the ribbon (bookmark) icon on the far left of the camera row to add it to Favorites
- Add to Favorites from the individual camera view
- On the individual camera monitoring screen, click the ribbon icon next to the camera name to add it to Favorites
- Access Favorites quickly
- Click the "Favorites" tab at the top of the Camera List to filter and display only your starred cameras